
If you have developed a wordpress plugin and you want to share it with rest of the world you need to download the Tortoise SVN which will enable SVN on your windows machine.
Differently from many other sites that let you upload your files through a simple form, or let you host your files on your on website, and link to them, Wordpress uses a version control system: Subversion. When you request hosting for a plugin, a subversion repository (directory) for your plugin is created (the url to that repository is mailed to you). You'll have to create a local repository on your computer, put the plugin files in it, and upload everything to the repository Wordpress created for you.
After downloading the latest version, install it on your windows machine and restart. Follow the steps one by one to successfully submit your wordpress plugin.
1) Add your plugin by creating a SVN repository account using the wordpress Plugin add page. Your account will get up & running after some time, depending upon the requests in the queue.
2) After first step you get access to the repository, your plugin files become accessible at http://svn.wp-plugins.org/plugin_name.Here you can push the php files and other assets like images, style files etc.
From that repository, anyone can check out a copy of your plugin files onto their local machine, but, as a plugin author, only you have tho authority to check in. That means you can make changes to the files, add new files, and delete files on your local machine and upload those changes back to the central server.
Subversion keeps track of all these changes so that you can go back and look at old versions or revisions later if you ever need to. In addition to remembering each individual revision, you can tell subversion to tag certain revisions of the repository for easy reference. Tags are great for labelling different releases of your plugin.
3) Now checkout the blank repository from your svn account:
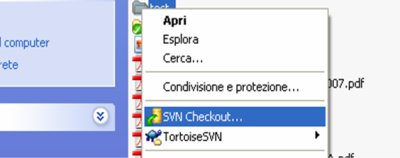
A new window will open:
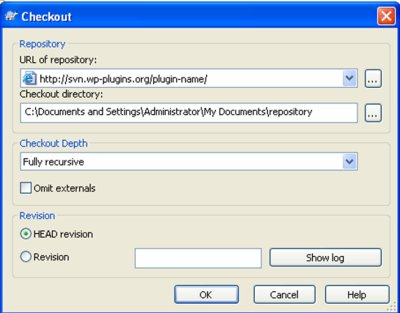
As 'URL of repository' put the link you found in the mail.
The 'Checkout directory' should already have a value. If the name of the plugin is added after the folder name, you can either delete that part, or let Turtoise create the new subfolder.
Click Ok and wait until the program has finished downloading. If everything went ok, now the repository folder will contain three subfolders: branches, tags and trunk.
A blank repository will contain nothing but 3 empty folders that are, branches, tag, trunk . You need to copy your plugin files into the trunk folder. These files will be your .php files, readme.txt and the screenshots.gif.
You can download the standard readme.txt and create one for your plugin.After creating the readme.txt, try validating it on readme validator. Readme.txt contains all the information about your plugin. It contains the version number, changelog, faq, description and the stable tag. The stable tag defined at the top of the readme.txt tells wordpress plugin page that which is the stable version of the plugin.
4) Put the files of your plugin (not the zip) in the trunk subfolder of your local repository.
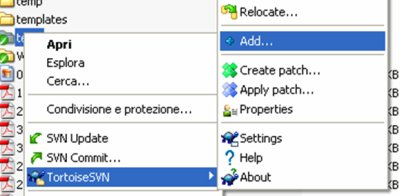
Next, right click on the repository folder and choose Turtoise SVN > Add
5) After adding the file to the trunk folder, right click on the folder and click SVN commit from the context menu, as shown in the picture below. This will commit changes from your local machine into the SVN repository.
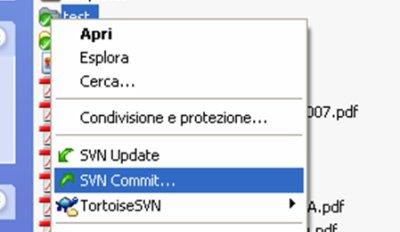
After this step you need to wait until the Wordpress plugin directory is updated (normally every 15 minutes) and your plugin will be online.