Each new user need at the beginning for a hosting plan. You can establish these plans and their costs from the main menu.In this tutorial you will learn step by step the process of adding a hosting plan to your reseller account. Let's start:
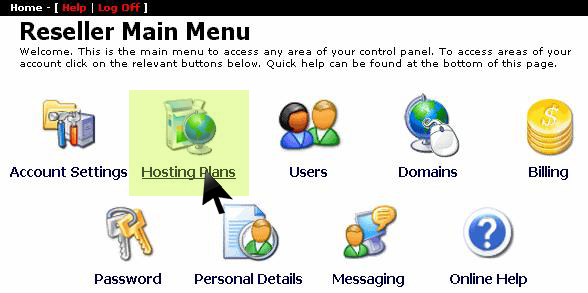
1) From the main menu of the your reseller account select the option "Hosting Plans”:
How to create a hosting planArchive Unresolved - Placeholder Asset" style="vertical-align: middle;" title="hosting plan" width="550" />
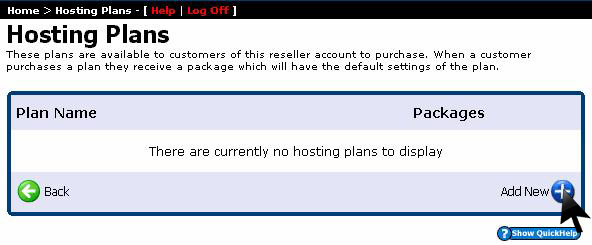
2) At the beginning you will not have any hosting plan added to your account. To add a new hosting plan, click on "Add New"as you see in the image below:
How to create a hosting planArchive Unresolved - Placeholder Asset" style="vertical-align: middle;" title="hosting plan" width="550" />
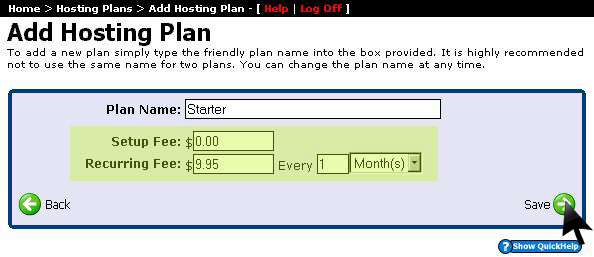
3) In the next screen enter the name that you want for the hosting package,add the cost and the time to renew it and then press "Save":
How to create a hosting planArchive Unresolved - Placeholder Asset" style="vertical-align: middle;" title="hosting plan" width="550" />
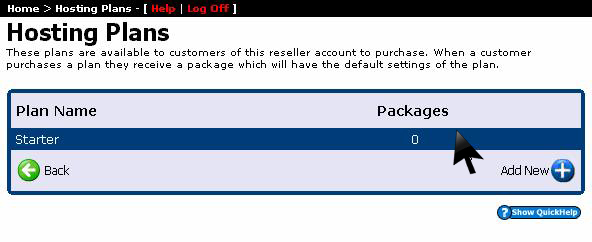
4) Now you have added your first hosting plan. Click on it to change all the settings:
How to create a hosting planArchive Unresolved - Placeholder Asset" style="vertical-align: middle;" title="hosting plan" width="550" />
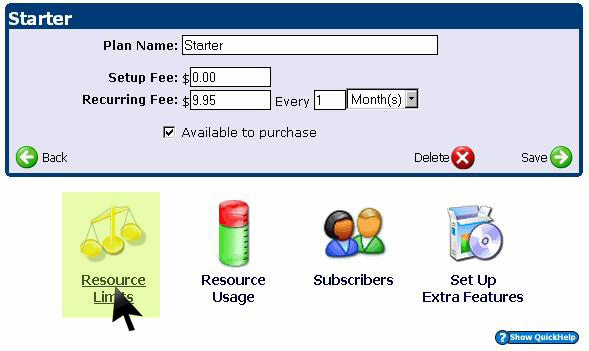
5) In the menu of the selected package click on the option "Resource Limits":
How to create a hosting planArchive Unresolved - Placeholder Asset" style="vertical-align: middle;" title="hosting plan" width="550" />
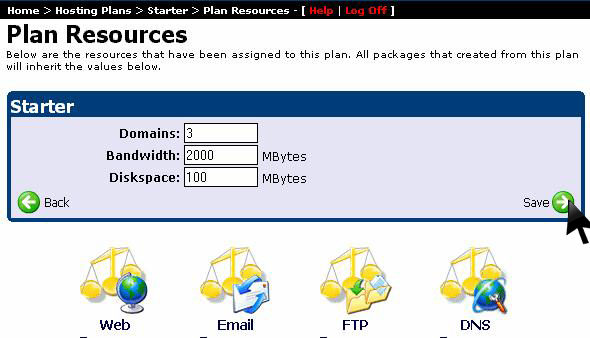
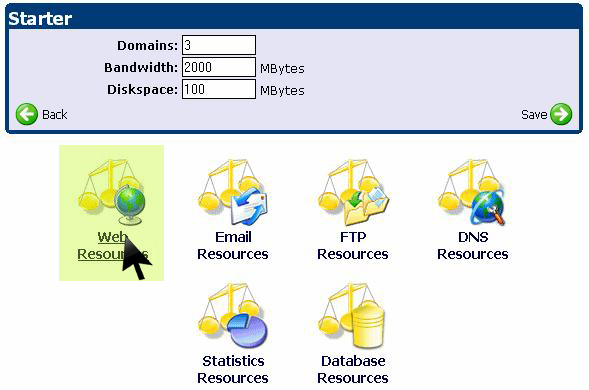
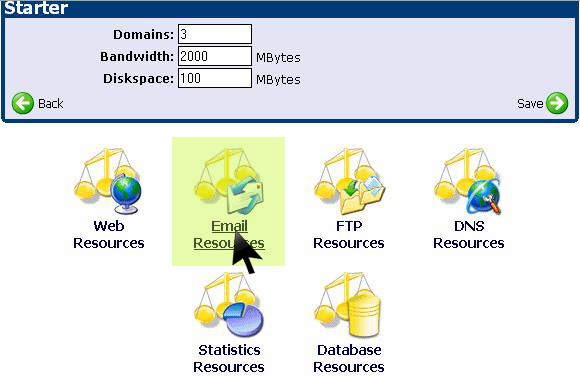
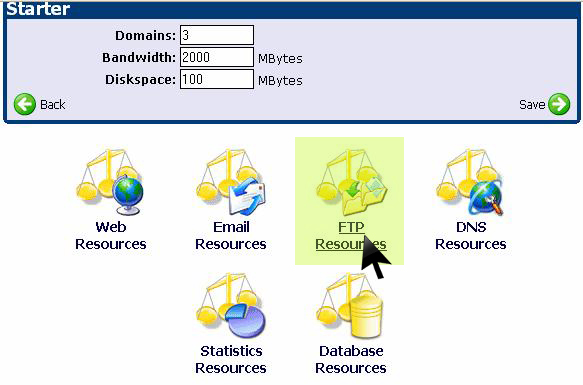
6) Under the "Resource Limits" you have more options such as: Web Resources, Email Resources, FTP Resources, DNS Resources, Statistics Resources and Database Resources.
To begin enter the number of domains, bandwidth and disk space that this plan will have for all the packages. Finally click "Save":
How to create a hosting planArchive Unresolved - Placeholder Asset" style="vertical-align: middle;" title="hosting plan" width="550" />
7) Option "Web Resources":
How to create a hosting planArchive Unresolved - Placeholder Asset" style="vertical-align: middle;" title="hosting plan" width="550" />
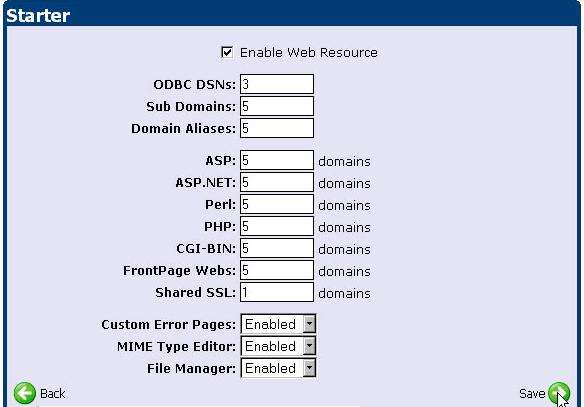
Here you can set the limits of domains and subdomains on a web host package created on this plan. Finally click "Save":
How to create a hosting planArchive Unresolved - Placeholder Asset" style="vertical-align: middle;" title="hosting plan" width="550" />
8) Option "Resources Email:
How to create a hosting planArchive Unresolved - Placeholder Asset" style="vertical-align: middle;" title="hosting plan" width="550" />
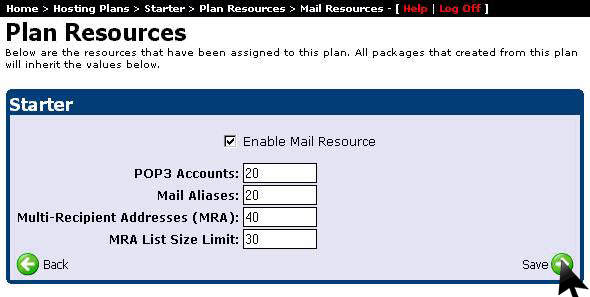
"Email Resources" allows you to set email accounts for the selected plan:
How to create a hosting planArchive Unresolved - Placeholder Asset" style="vertical-align: middle;" title="hosting plan" width="550" />
9) Option "FTP Resources”:
How to create a hosting planArchive Unresolved - Placeholder Asset" style="vertical-align: middle;" title="hosting plan" width="550" />
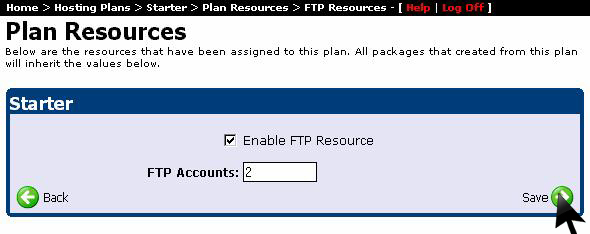
Option "FTP Resources" allows you to set the number of FTP accounts to be assigned to the packages that will use this plan. Finally click "Save":
How to create a hosting planArchive Unresolved - Placeholder Asset" style="vertical-align: middle;" title="hosting plan" width="550" />
10) Option “DNS Resources”:
How to create a hosting planArchive Unresolved - Placeholder Asset" style="vertical-align: middle;" title="hosting plan" width="550" />
This option allows you to control the settings related to DNS. Will allow a user to set whether or not you can edit his DNS:
How to create a hosting planArchive Unresolved - Placeholder Asset" style="vertical-align: middle;" title="hosting plan" width="550" />
11) Option “Statistics Resources”:
How to create a hosting planArchive Unresolved - Placeholder Asset" style="vertical-align: middle;" title="hosting plan" width="550" />
This option will allow you to choose if a customer can see statistics for his account or not. We will set it as "Enable". At the end press "Save":
How to create a hosting planArchive Unresolved - Placeholder Asset" style="vertical-align: middle;" title="hosting plan" width="550" />
12) Option “Database Resources”:
How to create a hosting planArchive Unresolved - Placeholder Asset" style="vertical-align: middle;" title="hosting plan" width="550" />
This option will allow you to set if a client can have access to add databases on his account, how many and what kind of databases. Finally click "Save" as you see in the image below:
How to create a hosting planArchive Unresolved - Placeholder Asset" style="vertical-align: middle;" title="hosting plan" width="550" />